
Mountain Village Guide part 1 of 2 - A Simple and Quick Painting Guide


Thatching Made Simple and some Corrugated Tin
This quick paint and terrain guide aims to show how a few simple techniques and materials can create a really immersive piece of terrain. In fact a small diorama that can be used for gaming or just look nice on the shelf.
Thatch is a common roofing material that is used all over the world. It's an unavoidable type of roofing if the gamer is aiming for a specific regional or era look for the table. As this is the case then why make it more difficult and time consuming than it needs to be? The same can be said for corrugated tin roofs. These are all over the place too, most often repairing or replacing thatch.
Gary Faulkner is head of the design department at Sarissa Precision and both he and the design team work hard to turn ideas and concepts into reality.
He is also responsible for all the painted kits you see on the Sarissa Precision website.
He recently wrote a series of award winning articles on working with MDF for Wargames Illustrated, so he knows what he’s talking about. This guide has been created to give you the quickest results with minimal effort whilst using easy to source supplies.
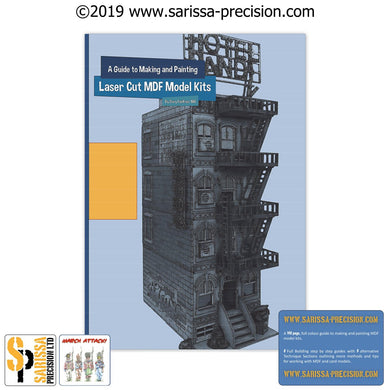
 We have also made this tutorial available as a FREE download click here to get your copy
Scouring Around

|
 |
 |
I've found the easiest route to get an effective finish is often the one of least resistance. After looking round at what is available the most convincing and simplest material I found for thatching is the humble scouring pad. The same for corrugated roofing - simple craft card. First simple step - cut to size and glue to the roof. Super Glue - It takes Minutes and no waiting around.
Spray Paint - Up and Close

Once the glue has dried, get your base colour down. Use a colour that gives a base depending on the age of the thatch. If its new thatch, use a dark earth, for something a few years old use a black or dark brown. When a thatch is old it often takes on a silver grey colour so a dark to mid grey gives a good base.
When I say up and close, I mean close at most 5cm away from the scourer. This will soak the paint in all the way, quickly. Leave it to dry in a well ventilated place.
Corrugated Repairs

Corrugated craft card is a 'most excellent' raw material. It's great for roofs and walls. It comes with a flat backing that can be peeled off. This means that you can glue it down onto flat surfaces and, by removing the backing, overlap sheets to get a 'real' effect. When using it as a 'repair' over lap the thatch, bend, crease and dent it a little. Use a finger nail or brush handle tip. Think where nails would be and where the under-frame may affect it. Spray the whole roof in one go.
Dry Brushing

There's no getting away from it. Remember not all thatching is the same. As said above the colour changes with age and weather conditions. If the thatch is in a wooded area it will get covered in moss.
I use 3 colours for my thatches, a base of dark earth followed by an ochre or beige. Brush them on lightly so that the thatch texture is not blocked. Make it patchy and blend it in. I finish with an over brush on a light grey. It blends the base coats in and gives an aged silver look to the finished roof.

Ready for Rust

|
 |
 |
As said before the craft card is great for walls as well as roofs. I use a grey base coat for tin sheet. It represents the galvanised coating which is matt when new.
For this build I wanted some panels to have been scavenged so I rough painted a base green.
I use 3 shades of 'Rail Match' rust paint. Start dark to light (Brake Dust). Take a look at some rusty corrugated panels first. They are patchy and most often the rust is on the ridges and only starts to get into the troughs towards the bottom. For really deep rust I use 'Dirty Down' Rust Effect or a Sepia wash.

|
 |
A Little Dusting
Once the rust and thatch is dry I go over with a light dry brush of a 'bone' colour. It’s that blending effect again.
Matt coat the whole building. This may affect the 'Dirty Down Rust Effect'. If it does, re-apply it and feather it in. I also add a little the rust weathering powder after matt sealing.

EQUIPMENT AND MATERIALS USED
|
Spray Paints Car Primer - Matt Black Humbrol Acrylic Spray - Sea Grey 27 |
Rail Match Paints Authentic Colour (2405) Dark Rust Authentic Colour (2404) Light Rust Authentic Colour (2416) Brake Dust |
|
Acrylic Paints Ravell (Matt) (361-86) Khakibraun - Olive Brown Ravell (Matt) (361-89) Beige - Beige (Yep...) Ink Washes Citadel Shade - Seraphim Sepia (Matt) |
Extras Dirty Down - Rust Effect (durtydown.co.uk) Humbrol Weathering Powder - RUst 12605 (AV0008) Roofing Kitchen Scouring Pads and Corrugated Craft Card |
![]() Established in 2010, Sarissa Precision Ltd. has evolved into the industry’s leading manufacturer of (reasonably) awesome MDF model kits. Our range of expertly designed kits includes buildings and accessories for many periods and settings as diverse as the Dark Ages, WWII, SciFi and more. Working with leading companies - Warlord Games, Oathsworn Miniatures, Mantic Games and Footsore Miniatures & Games, Sarissa Precision also produce a number of bespoke lines for bestselling games such as Gates of Antares, Burrows and Badgers, The Walking Dead: All Out War and Gangs of Rome.
Established in 2010, Sarissa Precision Ltd. has evolved into the industry’s leading manufacturer of (reasonably) awesome MDF model kits. Our range of expertly designed kits includes buildings and accessories for many periods and settings as diverse as the Dark Ages, WWII, SciFi and more. Working with leading companies - Warlord Games, Oathsworn Miniatures, Mantic Games and Footsore Miniatures & Games, Sarissa Precision also produce a number of bespoke lines for bestselling games such as Gates of Antares, Burrows and Badgers, The Walking Dead: All Out War and Gangs of Rome.